XYou can write your Selenium scripts in C#. It is one of mostly using programming language for Selenium tests. As an IDE, Visual Studio(VS) is the best environment for .net products. You can setup a Selenium running project from scratch by following steps:
1. Create a C# project in Visual Studio: Selenium First
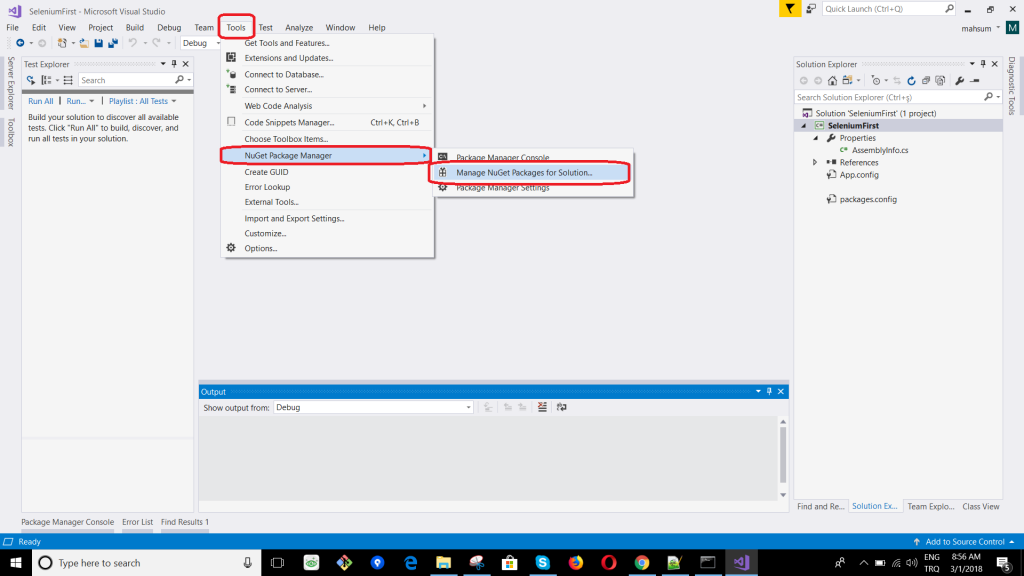
2. Install Selenium Webdriver from Nuget. From menu bar of Visual Studio go to: Tools -> NuGet Package Managers -> Manage NuGet Packages for Solution

3. Click on Browse tab.
4. In search box write: Selenium webdriver
5. Click on result for Selenium.WebDriver binds
6. Select your project on the right side of list section
7. Select version you demand and click on Install button

8. Wait for installation completion
9. Add an empty c#file (.cs)
10. Enter following code
11. Click on “Run” button on menu bar
After a short while a Chrome browser will be appear, execute commands and then closed.
P.S: You should download Chrome driver or driver of whatever browser you want to use in your script(firefox, ie, safari…)